Hey there! If you’re running a facility that uses oil-free screw compressors, you know how critical those little workhorses are for keeping operations running smoothly—whether it’s for food & beverage packaging, pharmaceutical manufacturing, or even electronics part fabrication. And let’s be real: one of the most overlooked maintenance steps that keeps these compressors chugging along? Cleaning the air intake. I’ve been supplying oil-free screw compressors for over a decade now, and I can’t tell you how many times I’ve gotten a call from a customer panicking because their unit’s pressure dropped, or it’s making way more noise than usual—nine times out of ten, it’s a clogged intake. Oil-Free Screw Compressor

Before we dive in, let’s get one thing straight: oil-free screw compressors depend on pristine intake air because there’s no oil in the compression chamber to lubricate or seal gaps. Even tiny bits of dust, lint, pollen, or other particulates will build up fast on the intake filter and housing, forcing the compressor to work way harder than it should. That leads to higher energy bills, shorter filter life, and even premature wear on the screw rotors themselves. So cleaning the intake isn’t just a “nice to do” — it’s a must-do. And yes, I’m gonna walk you through exactly how to do it, plus share a few pro tips I’ve picked up from working with hundreds of compressor operators across different industries.
First, let’s gather your supplies. You don’t need fancy industrial gear for this, but skimping will make the job way worse. Here’s what you’ll need: a set of safety glasses (trust me, dust flying up isn’t fun), nitrile gloves (oil-free intake means no oil mess, but still keep your hands clean), a flathead screwdriver or a socket set (most intake housings are held on with clamps or bolts), a soft-bristled nylon brush (no metal bristles—they’ll scratch the housing or filter), low-pressure compressed air (like 30-40 PSI—high pressure will tear your filter), a mild, pH-neutral detergent (nothing harsh like bleach, it’ll leave residue), a clean microfiber cloth, and the replacement pre-filter (wait, yeah—we’ll talk about when to swap, not just clean, and it’s better to have a spare handy).
Now, step one: prep your workspace and lock out the compressor. This is non-negotiable. You don’t want the compressor kicking on while you’re digging around the intake—seriously, that’s how accidents happen. Turn off the main power switch, close the air outlet valve, and slap a “DO NOT OPERATE” tag on the control panel. Pick a well-lit, dry spot that’s out of the wind—wind will blow extra dust into the parts you just took apart. I like to lay down a plastic sheet too, so any loose gunk doesn’t spread all over the floor.
Step two: remove the intake housing and filter. The intake is usually on the side or top of the compressor, a big round or rectangular cover with a clamp or a few bolts. Loosen the clamp or unscrew the bolts slowly, then pull the housing off gently—don’t yank it, because there might be small hoses or sensors attached. Once the housing is off, you’ll see the primary intake filter, and maybe a pre-filter mesh behind it (more on that in a sec). Pull the filter out carefully—don’t shake it too much, or all the built-up gunk will fall right into the compressor’s intake port.
Step three: clean the intake housing. This is the part most people skip, but it’s super important. Even if the filter catches most of the dust, tiny particles will still stick to the inside of the housing over time. Take your microfiber cloth and wipe down the inside of the housing first—this gets the big crumbs. Then, mix a little bit of pH-neutral detergent with warm water in a bucket (just a capful of detergent per gallon of water, don’t overdo it). Dip your nylon brush in the solution, scrub the inside of the housing gently, and use a damp microfiber cloth to wipe it clean. Rinse it out with clean water, then dry it completely with a dry microfiber cloth. Any leftover moisture here will get pulled into the next air intake cycle, which is a no-no for oil-free compressors—moisture can lead to rust and mold.
Step four: clean the intake filter (if it’s reusable—wait, not all filters are, so check your manual first). A lot of first-time operators think all intake filters are disposable, but the washable mesh pre-filters and some high-quality primary filters can be cleaned a few times before replacement. Here’s how to do it right: if the filter is mesh, you can soak it in the detergent solution for 10-15 minutes first to loosen caked-on dust. If it’s a pleated paper or synthetic filter, don’t soak it—water can damage the pleats. Instead, use your soft nylon brush to gently scrub the front side of the filter (the side that faces the intake) in a circular motion, and use low-pressure compressed air to blow air through the back side. Always blow air from the inside out—never the other way around, because that’ll just push dust deeper into the filter. For reusable mesh filters, after soaking, rinse them with clean water and dry them completely (air dry overnight if you can, don’t use a heat source like a hairdryer, it can warp the mesh). For pleated filters, if you blow air through them and they’re still dirty, it’s time to swap them—don’t risk putting a half-clogged filter back in.
Step five: inspect the intake port. Before you put everything back together, peek into the compressor’s intake port (the hole where the filter sits). Use a flashlight—if you see any big chunks of debris, gently pick them out with a clean pair of tweezers or a soft brush. Never stick your fingers in there, and make sure there’s no loose cloth or brush bristles left from cleaning—those will get sucked into the compressor and cause serious damage.
Step six: reassemble everything, and don’t skip the seal check. Once the housing and filter are both completely dry, put the (cleaned or new) filter back into the housing. Make sure it seats properly—any gap here means unfiltered air gets in, and that defeats the whole purpose. Then, put the housing back on, tighten the clamp or bolts evenly (don’t over-tighten, that can crack the plastic housing), and check that all hoses and sensors are reconnected correctly. Remove the lockout tag, turn the power back on, and let the compressor run for a minute—listen for weird noises, check the pressure gauge, and make sure there’s no air leaking from the intake housing.
Wait a second, I know what some of you are thinking: “How often do I actually do this?” That’s a great question, and it depends on your environment. If your compressor is in a dusty sawmill, construction site, or a factory with a lot of lint (like textile manufacturing), you’ll need to clean the intake every 2-4 weeks. If it’s in a cleaner facility, like a pharmaceutical lab or a well-maintained electronics plant, every 2-3 months is usually enough. And a quick tip: track your filter pressure drop—most compressors have a gauge that shows the differential pressure across the filter. If that number jumps 10-15 PSI from your baseline, it’s time to check the intake, even if you haven’t hit your scheduled cleaning date yet.
Also, let’s talk about common mistakes I see operators make all the time. First, using high-pressure air to clean the filter. I get it, high air blows dust out fast, but it can also tear the filter material, leaving gaps where particulates can sneak through. Second, not drying parts completely. Moisture in the intake leads to rust on the screw rotors, and rust is a death sentence for oil-free compressors—once the rotors are pitted, they can’t seal properly, and you lose pressure and efficiency. Third, reusing a filter way too long. I’ve seen customers run their compressor on the same filter for a year, and by that point, it’s so clogged it’s like the compressor is sucking air through a straw. That wastes so much energy—studies show a clogged intake filter can increase energy use by 10-15%, which adds up to hundreds, even thousands, of dollars a year in utility bills. One of my customers in the food packaging industry switched from cleaning their filter every month to swapping it every 6 months, and saved almost $2,000 in energy costs in a year. Cool, right?
Another thing: if your intake has a pre-filter (that extra mesh layer before the main filter), make sure you’re cleaning that too. I see people wipe the main filter and ignore the pre-filter, and that pre-filter is the first line of defense. If it’s clogged, the main filter has to work way harder. And for you guys in super dusty environments, you can even add a second pre-filter—they’re cheap, and easy to swap when you do your regular maintenance.
Now, let’s circle back to why I’m telling you all this: I supply oil-free screw compressors, and my job isn’t just to sell you a unit—it’s to make sure it runs well for years. Over the last 10 years, I’ve worked with so many operators who ignored intake maintenance, had their compressor break down, and ended up having to buy a new one way sooner than they should have. Proper intake cleaning is one of the easiest ways to extend the life of your compressor, lower your energy bills, and avoid costly downtime.
If you’re not sure about how often to clean your specific compressor’s intake, or you need help picking the right filters, or even if you’re having issues that you think might be related to the intake, feel free to reach out. I know every facility is different, and I’m happy to help you figure out a maintenance schedule that works for your setup. No pressure, just honest advice.
Wait, one last quick tip: keep a log of your intake cleaning and filter swaps. Jot down the date you did the cleaning, the filter pressure, and any notes (like if you found extra dust from a nearby construction project). That way, you can spot patterns—like if your filter gets extra dirty every time the warehouse is being cleaned—and adjust your schedule accordingly. It’s a small step, but it makes a huge difference in keeping your compressor running smoothly.
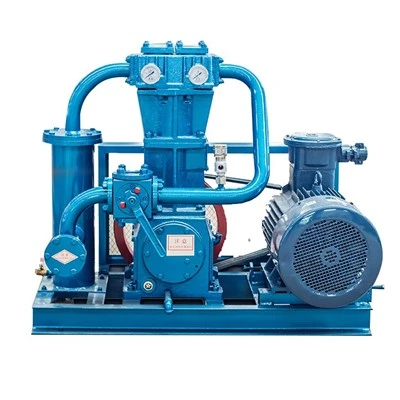
At the end of the day, oil-free screw compressors are investments, and like any investment, they need regular care to pay off. Cleaning the intake isn’t complicated, it doesn’t take more than 30 minutes if you’ve got the supplies ready, and it saves you from a ton of headaches down the line. If you’re in the market for a new oil-free screw compressor, or you need help with maintenance on your current unit, don’t hesitate to connect with us. We’ve got the parts, the expertise, and the team to support whatever you need. Don’t wait until your compressor is sputtering to take care of the intake—get on top of it today.
High Pressure Breathing Air Compressor References:
- Compressed Air Gas Machinery Association. (2021). Maintenance Guidelines for Oil-Free Screw Compressors.
- Pneumatics & Hydraulics Magazine. (2022). The Impact of Intake Air Quality on Oil-Free Compressor Efficiency.
- International Organization for Standardization. (2019). Standard 1217: Compressors for Air, Intake Air Quality Requirements.
Shanghai Sollant Energy Saving Technology Co., Ltd.
As one of the most professional oil-free screw compressor manufacturers and suppliers in China, we’re featured by quality products and good service. Please rest assured to buy bulk durable oil-free screw compressor from our factory. Welcome to view our website for more information.
Address: No.215, Songri Center, Beihongqiao, Jiading District, Shanghai, China.
E-mail: info3@sollant.com
WebSite: https://www.sollant-gas.com/
